Recently, advances in web technologies have given us more and more ways to make our website, online store or company business card site more attractive. On today’s websites we can add background videos, all kinds of animations and effects for individual elements, parallax and much more. One of the more interesting solutions is placing three-dimensional elements on our page, and here too we have several options. It could be, for example, a video presenting a 3D object from every side. We could insert a photo showing the object from different perspectives. We can also build a pseudo-3D element in CSS alone. One of the most interesting options is actually placing a three-dimensional object on the website using WebGL, which provides access to a 3D API in browsers.
One of the most popular libraries using WebGL is Three.js, which lets us import any files with 3D objects and manipulate them freely. In today’s article we look at the basics of using the library and the possibilities it gives us.
WebGL: Three.js
WebGL extends the capabilities of JavaScript, giving us access to 3D graphics. To do this, WebGL uses the canvas element available in HTML5. WebGL code itself can be very long and complicated, which is why there are several libraries that make the task easier and greatly simplify writing code and working with the objects themselves.
In this article we look at the three.js library. The most important elements needed to run a 3D project in the browser with this library are the declaration of a scene, a camera and a renderer.
The scene is the space in which we place all the objects we want to show on the page. The camera is a special object suspended in this space and is the point of reference from which we look at the object. The renderer, put simply, is the graphics engine used to show the whole scene from the camera’s perspective.
Depending on the kind of 3D materials we have, loader libraries for those files will also be useful.
An example declaration of the basic components:
var scene = new THREE.Scene();
var camera = new THREE.PerspectiveCamera(50, $wrapper.innerWidth/$wrapper.innerHeight, 1, 5000);
var renderer = new THREE.WebGLRenderer({antialias: true});
Lights
Another important, though optional, element to place in the scene is lighting. There are many types of scene lighting, which let us achieve different effects, imitating for example natural light diffused over the whole object or studio light aimed directly at it. In general, all lights can have different colour variants and intensities, which can significantly affect the final result. The base class that other types of light inherit from is Light. We cannot use it directly, though; it is only a base for the others and contains the two parameters mentioned earlier: the colour as a hexadecimal value and the intensity as a number.
One example of a light often used to illuminate objects in a scene is AmbientLight, which lights an object evenly from every side, giving an ambient effect, as the name suggests.
const light = new THREE.AmbientLight( 0x404040 ); // soft white light
scene.add( light );
Another is HemisphereLight, which simulates a kind of natural light shining on objects from top to bottom, “from the sky to the ground”.
const light = new THREE.HemisphereLight( 0xffffbb, 0x080820, 1 );
scene.add( light );
One more important type of lighting is PointLight, which works like a light bulb of a specific colour placed at a particular spot in the scene. It emits light of a given colour from one specific point in the scene, spreading endlessly in every direction.
const light = new THREE.PointLight( 0xff0000, 1, 100 );
light.position.set( 50, 50, 50 );
scene.add( light );
There are several other types of light, and it is entirely up to us which one we use and what effect we want to achieve; the possibilities are practically unlimited.
The 3D scene
After the initial preparation of the environment, we have several ways to place any object in the scene. We can do it in code alone, declaring a list of different objects and combining them.
var geometry = new THREE.SphereGeometry( 15, 32, 16 );
var material = new THREE.MeshBasicMaterial( { color: 0xffff00 } );
var sphere = new THREE.Mesh( geometry, material );
scene.add( sphere );
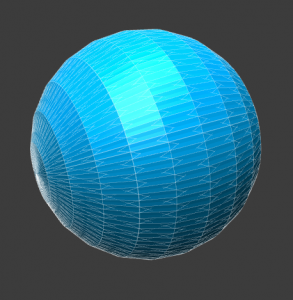
First we create the structure of the 3D object, in this case a sphere, then we give it a style, for example a colour, after which we combine the two elements and add the object to the scene.
We can also apply images with reflection effects and the like to objects:
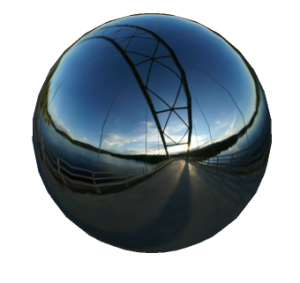
We can also import external objects, using the appropriate loaders to load ready-made 3D objects, for example in .OBJ format, together with materials in .MTL format that define the look applied to the object.
var loader = new OBJLoader();
loader.load(
	'models/dom.obj',
	function ( object ) {
		scene.add( object );
	},

	function ( xhr ) {
		console.log( ( xhr.loaded / xhr.total * 100 ) + '% loaded' );
	},

	function ( error ) {
		console.log( 'An error happened' );
	}
);
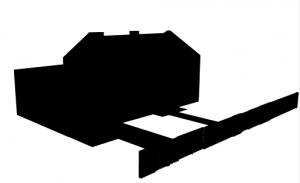
Combined with loading materials onto the object, it looks like this:
var mtlLoader = new MTLLoader()
mtlLoader.load(
    'models/dom.mtl',
    (materials) => {
        materials.preload()

        const objLoader = new OBJLoader()
        objLoader.setMaterials(materials)
        objLoader.load(
            'models/dom.obj',
            (object) => {
                scene.add(object)
            },
            (xhr) => {
                console.log((xhr.loaded / xhr.total) * 100 + '% loaded')
            },
            (error) => {
                console.log('An error happened')
            }
        )
    },
    (xhr) => {
        console.log((xhr.loaded / xhr.total) * 100 + '% loaded')
    },
    (error) => {
        console.log('An error happened')
    }
);
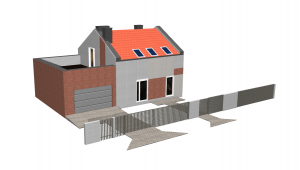
The result is our object placed in the scene with the materials applied.
Modifying the look of objects, swapping images, changing colours
After setting up the scene and adding specific objects, lighting and other details, we can also manipulate all the parameters of the object itself. Of course, everything depends on how the object was prepared.
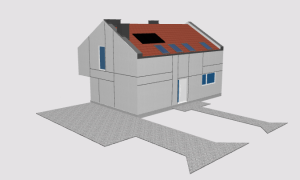
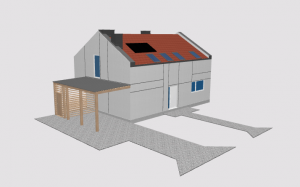
Most objects are divided into so-called meshes, smaller fragments that we can access from a script. We can hide and show individual elements.
Hiding elements:
function(elem, hide) {
    elem.forEach(i => {
        i.visible = hide;
    });
    this.render();
},
which gives us the following effect:
We can also change their look, apply other materials or change colours:
function(elem, color) {
    elem.forEach(i => {
        if (i.material.color) {
            i.material.color.setHex( color );
        } else {
            if (i.material.length > 1) {
                i.material.forEach(c => {
                    c.color.setHex( color );
                });
            }
        }
    });
    this.render();
};
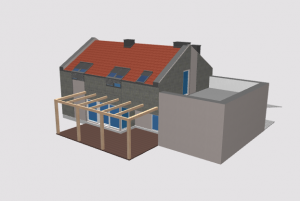
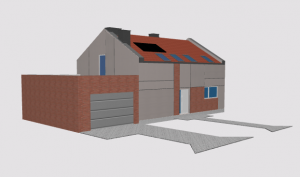
All these options give us a great many possibilities for generating content dynamically and making our website more attractive. We can create, for example, a product configurator that presents the desired product live, as you can see in one of our web application projects, currently online here.