
For many years Cloudflare has been giving us great tools for our websites. Everyone already knows their excellent DNS servers, where we can park domains for our applications for free. However, few people keep up with all the new features the creators of this excellent platform keep preparing for us.
Imagine a situation where we are developing an application locally in a development environment. We are connected to the internet but do not have a public IP address, and we would like to share the results of our work with the world. Contrary to appearances, this can happen quite often. For example, during work you may need to share with team members issues that can only be observed on your machine. This speeds up the work, because there is no need to push changes to the development server.
A similar scenario would be the need to verify an integration with an electronic payment system implemented by an online store under development. Payment systems such as PayU or Przelewy24 usually communicate with external e-commerce applications over two channels. The first is the browser, in which the user goes through the payment process. The second is a channel unavailable to the user, in which the payment system and the website communicate, for example via a REST API. Such a mechanism is hard to test, because catching a possible error requires an instance of the web application with public access. On top of that, the data exchange is asynchronous, which all adds up to a complex process.
It is very common for internal applications, available only to the company’s staff, to be installed on local addresses in company networks. These are websites that work only within a closed infrastructure. There can be many reasons for this, from security and convenience to cost. Sometimes, however, these websites need to be made available outside the company’s premises, and that is when a problem arises that IT departments most often face.
Until recently we were quite limited in solving this kind of problem. Port forwarding on the router, virtual private networks or even more advanced solutions were used. Today Cloudflare comes to the rescue with its new product, Tunnel. In this post we will try to show in an accessible way how to prepare a web application installed in a local environment so that it is available to users outside our network under a friendly domain name.
How does it work?
You are probably wondering how it is possible that a user typing a domain name into the browser can reach resources running on a host in a private network without a public IP address. It is not as complicated as it might seem, and it all comes down to a special tool prepared by the Cloudflare team: “cloudflared”. It is a program available for all popular platforms that acts as a so-called connector. Its job is to set up a tunnel between Cloudflare’s edge servers and our local host. With this approach, in addition to giving us access to local resources, we can also assign the right domain or subdomain that will serve our website.
Step by step
Where should we start? A good start is to make sure that the web application we want to expose to the world works correctly. For the purposes of this article we will not write a new website. We will use another interesting solution: the HTTP server built into the Symfony framework. We will start a server instance whose job is to display an empty page with a sample message. So let’s get to work.
If Symfony is installed globally, it is enough to run the command:
symfony server:start
By default, the HTTP server should start on port 8000, with the document root set to the folder we were in when we ran the command.
Let’s also make sure that requesting the server address does not return a 404 error. To do that, we will create an index.php file with some content.
touch index.php && echo "<?php echo 'hello world'; " > index.php
If everything works correctly, after typing https://127.0.0.1:8000 into the browser’s address bar we should see something similar to the image below.

Since everything is already working on our local machine, we should go to our Cloudflare account. After logging in, select the domain we will be working with. Then, in the menu panel, choose Traffic -> Cloudflare Tunnel. A screen with a description of the service and a link to the Zero Trust dashboard will appear. When you open it, a completely new management dashboard appears, this time with a new set of tools for increasing the security of our applications. We will only use Access Tunnel, but it is worth getting to know the huge range of possibilities Zero Trust offers.
What is Cloudflare Zero Trust?
Cloudflare Zero Trust is a platform for managing network security in the cloud. It is based on the assumption that all requests and network access are potentially dangerous and must be verified before access is granted. This makes it possible to protect the network against attacks, malware and unauthorised access.
The capabilities of the Cloudflare Zero Trust platform include:
- Verifying the identity of users and devices before granting access to the network or website
- Controlling access to applications and network resources based on various criteria, such as geographic location, device type or permission level
- Creating and managing access policies for individual applications and network resources
- Protection against phishing attacks and malware
- Monitoring network traffic and detecting suspicious behaviour
Cloudflare Zero Trust is a flexible solution that can be adapted to the individual needs and requirements of every company.
The tunnel
Cloudflare Tunnel is a tool that lets you connect to a server through a secure network tunnel. Using Cloudflare Tunnel can bring several benefits:
- Security: Cloudflare Tunnel provides a secure connection to the server through an encrypted network tunnel, which protects against hacking attacks and other cyber threats.
- Flexibility: Cloudflare Tunnel lets you connect to the server from anywhere and from any device, allowing flexible use of the server’s resources.
- Performance: Cloudflare Tunnel can speed up data transfer between the server and the client by shortening the data transmission route.
- Savings: Cloudflare Tunnel can save server resources by reducing the amount of network traffic, which can translate into lower server maintenance costs.
- Support: Cloudflare Tunnel is supported by Cloudflare’s team of specialists, which guarantees help in case of problems with configuration or use.
Remember, though, that Cloudflare Tunnel is not the ideal solution for every situation, and you should carefully analyse whether it suits your specific needs and requirements.
A new tunnel for communicating with our website
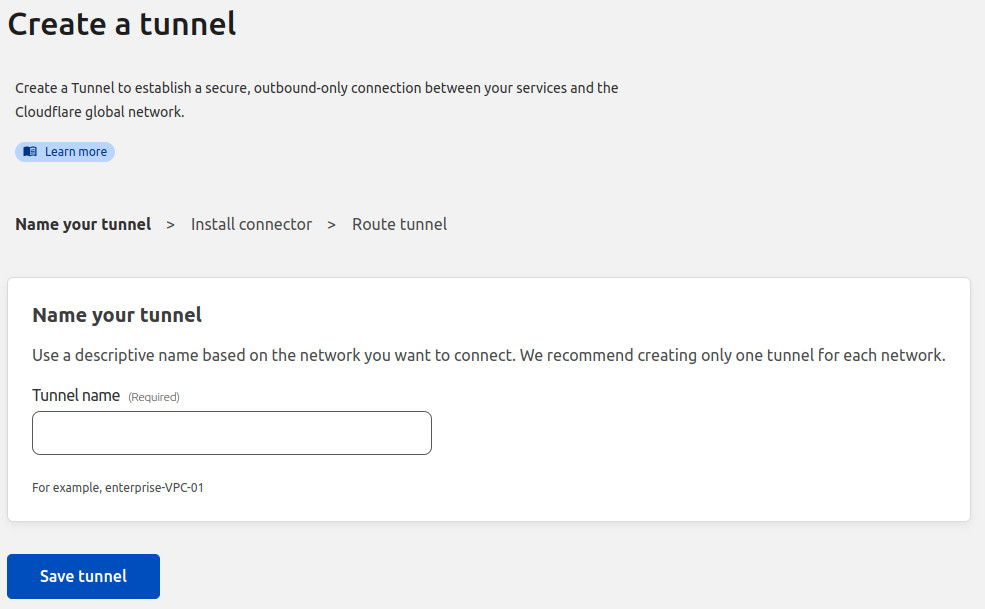
After choosing the right option from the menu, click “Create a tunnel”. We will be taken to a form where we need to enter a name.
After saving, we will be taken to the next step of the form, which already contains quite a lot of information. First, pay attention to the top: choose your operating system. Below are console instructions prepared especially for us.
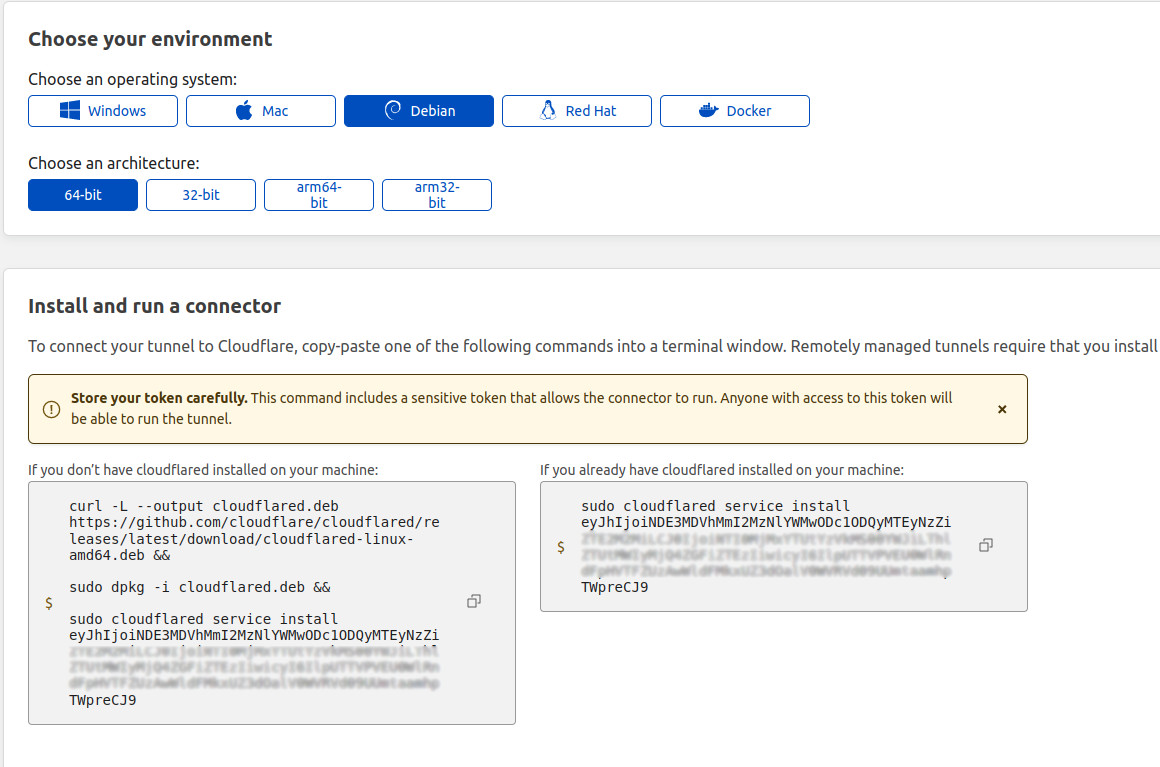
The first command downloads a ready-made package for our OS. Then the installation runs. Finally, cloudflared is started along with the service linked to the tunnel we have just created. After entering the commands in the command line, we should have the connector running locally. Now click “next” to go to the next step, where we set the details of public access to the website.
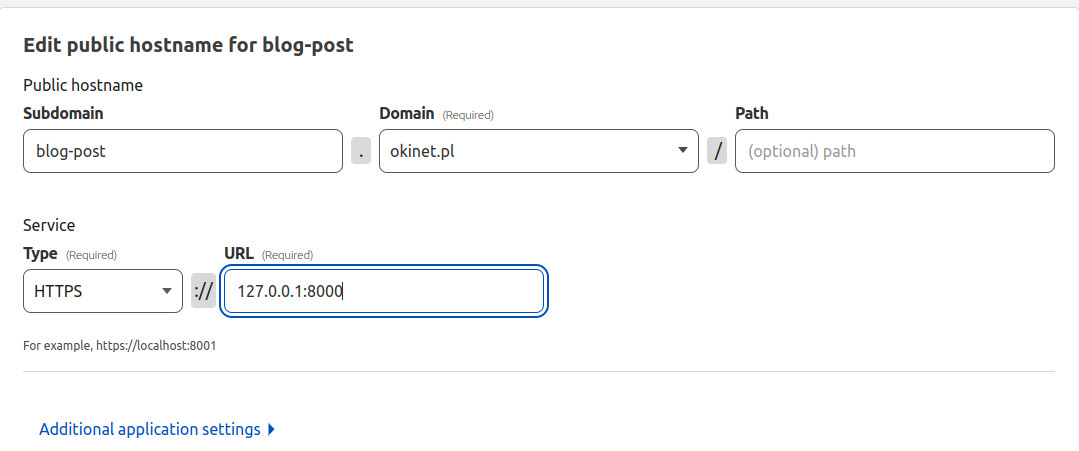
We have reached the end of the form and are ready to test whether our solution works correctly. In the example I used the subdomain blog-post.okinet.pl. Cloudflare will automatically add DNS records that make the address resolve correctly. So let’s check what happens when we type the configured address into the browser’s address bar.

As you can see, everything works smoothly. At this point we can share the link with users outside our location. Keep in mind that the website will be publicly available only as long as your local host is serving the web application. If you stop the HTTP server or the connector, users will see a 5xx error.
Summary
Cloudflare Tunnel seems to be an excellent solution both for developers and for network infrastructure administrators. It also makes it easy to add an authentication process to our web application, with a wide range of options to choose from.
We always encourage our clients to explore what Cloudflare offers. They are often surprised how many costly processes can be handled cheaply and quickly with the services Cloudflare provides.